A clear capture, start to finish.
Capture what matters, explain it, and share the result. This guide is also available offline inside the app.
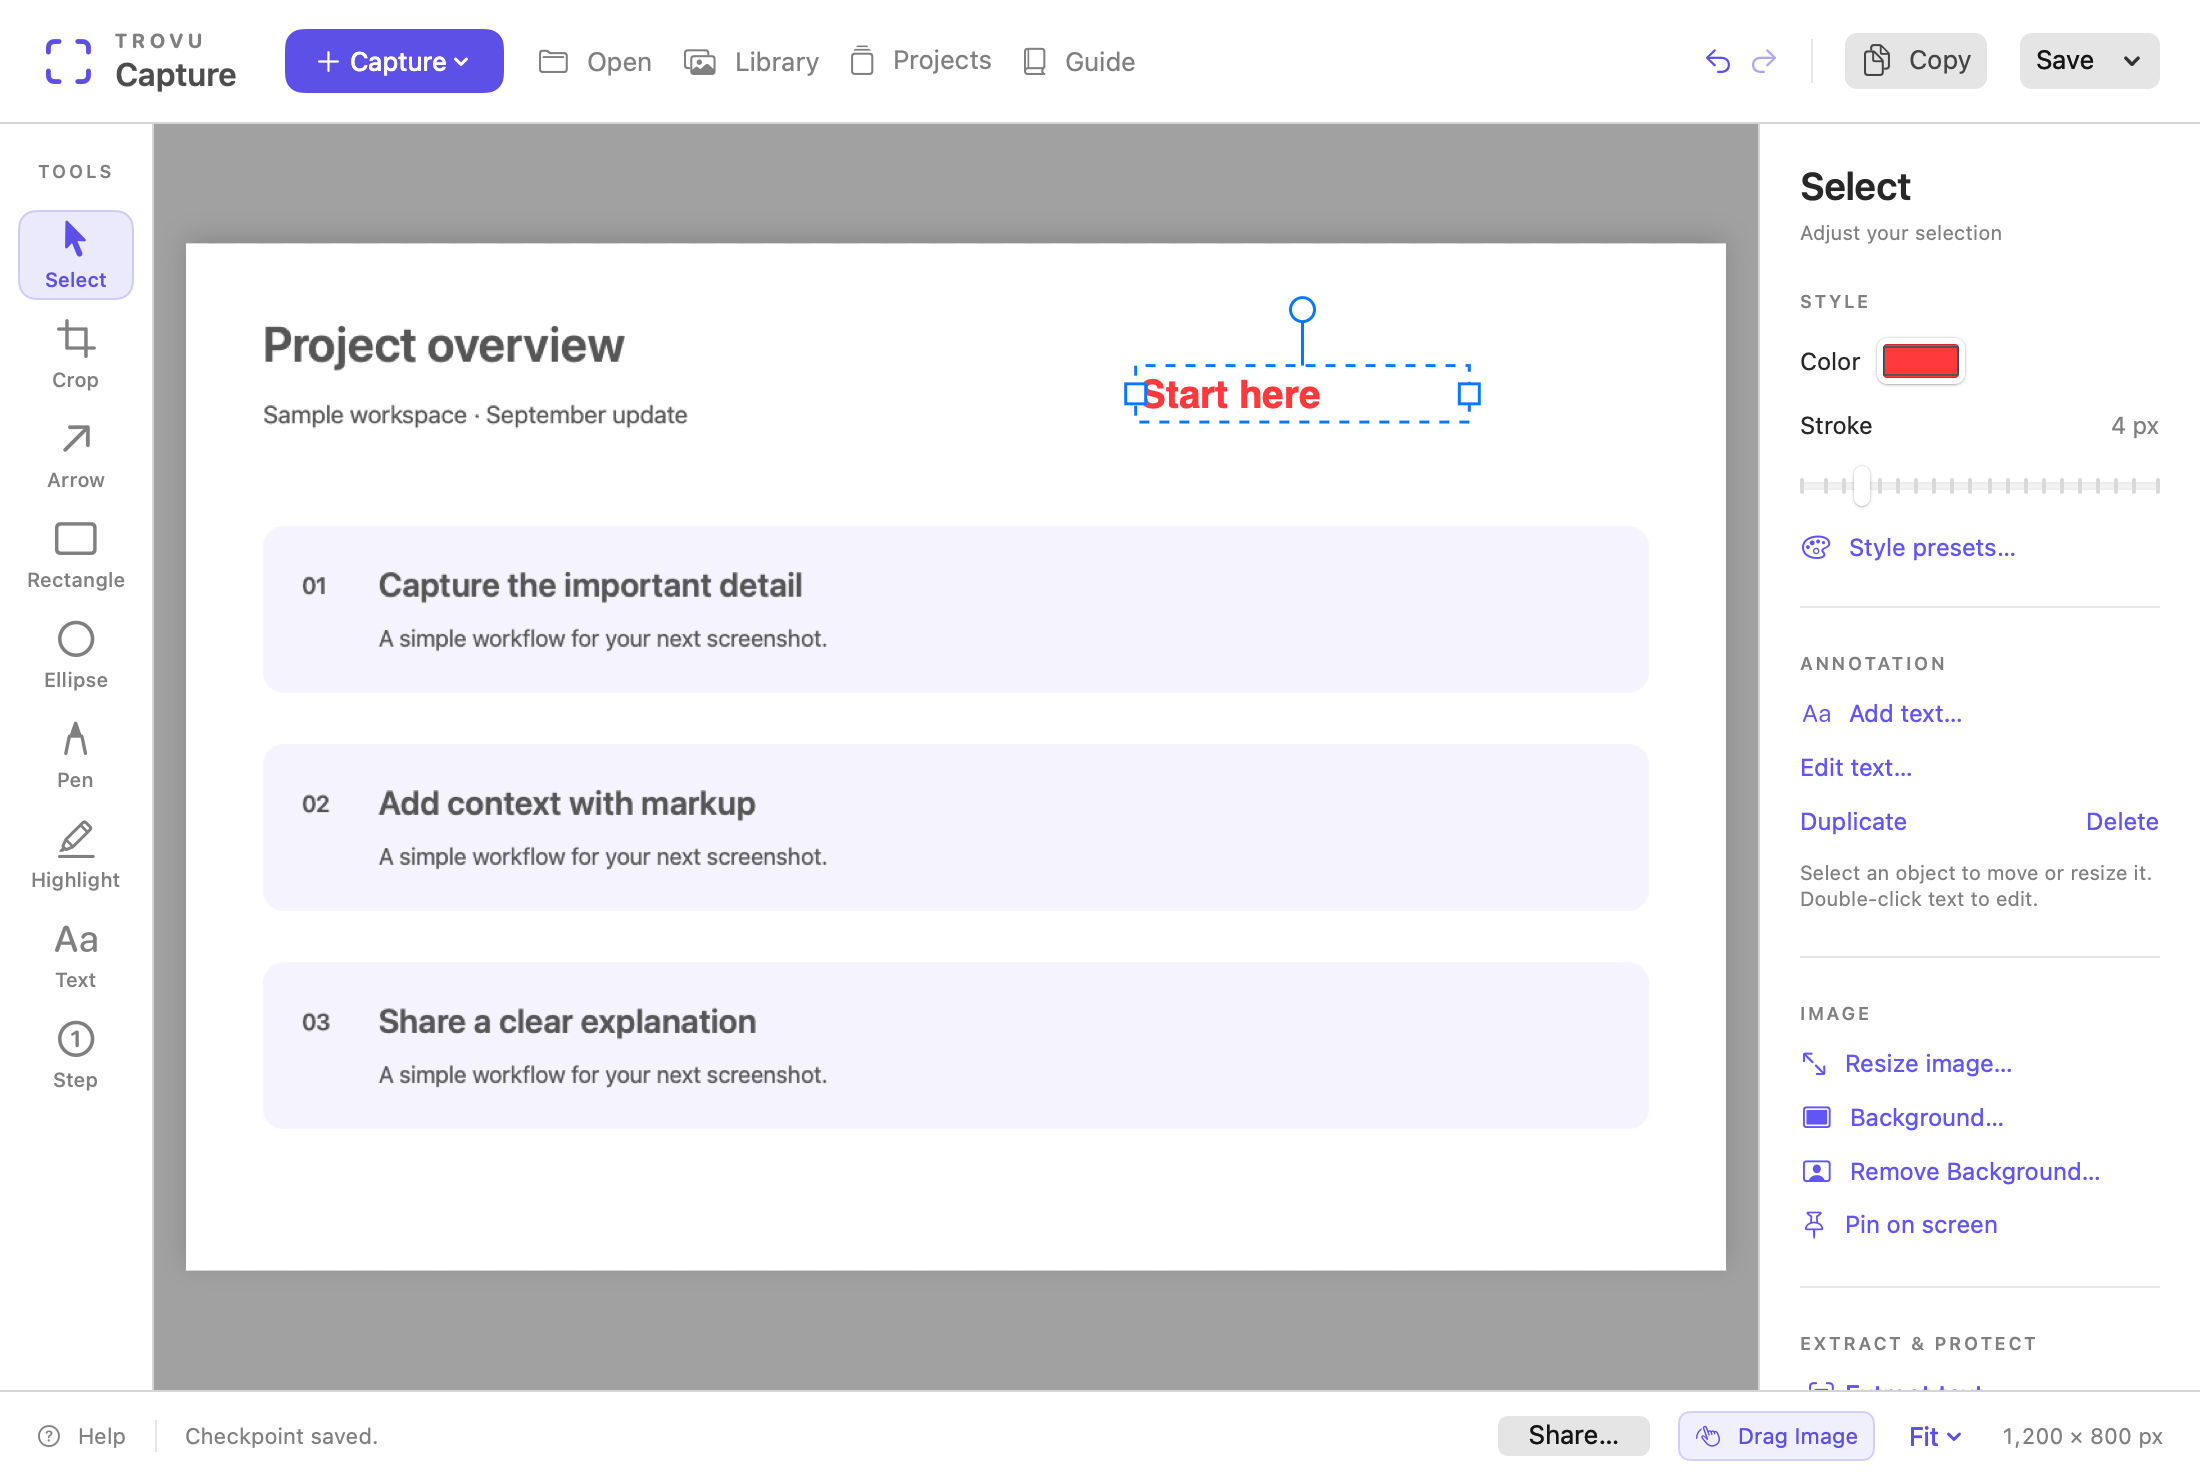
- Choose Capture → Selected Region and drag over the area you need. Press Escape to cancel.
- Pick a tool from the left rail. Add an arrow, highlight, text, or numbered step. Use the right inspector to adjust its style.
- Use Copy or Save → Export Image… to share a finished image.
Want to keep editing later? Choose Save → Editable Project…. Image exports flatten annotations; a project keeps them editable.
Use the topic links above or your browser’s Find command to locate a feature.
Choose a capture mode
Every successful capture is copied to the clipboard immediately, ready to paste with ⌘V. Editing does not change that copy until you choose Copy again. This applies to every after-capture action.
| Mode | When to use it |
|---|---|
| Selected Region | Drag a rectangle around part of the screen. Dimensions and a magnifier help you place its edges. |
| Window | Use the macOS picker to select one app window. Its bounds define the capture. |
| Full Screen | Capture one display; choose the display by name in the Capture menu. |
| All Screens | Combine connected displays into one image, preserving their arrangement. |
| Freeform | Choose a display, then draw a closed outline. Pixels outside it are transparent. |
| Repeat Last Region | Capture the same screen rectangle again without drawing another selection. |
| Scrolling | Build one long image from overlapping frames you capture while scrolling. |
Why repeat the last region?
It is useful for before-and-after comparisons or repeated captures of a dashboard or app panel. It remembers the rectangle during the current app session. It captures those screen coordinates; it does not track a window that moves. If no region is available, or the display arrangement or scale changes, you select a new region.
Build a scrolling capture
- Choose Capture → Scrolling…. Select the scrolling content inside one display, preferably excluding fixed headers and scrollbars.
- Scroll the source window downward a little. Leave some content from the previous frame visible, and keep the window in the same position.
- Wait for scrolling to stop, then choose Add Frame. Check the stitched preview.
- Repeat until you have the content you need, then choose Finish Capture.
Trovu does not scroll another app automatically. Cancel leaves your existing editor image unchanged.
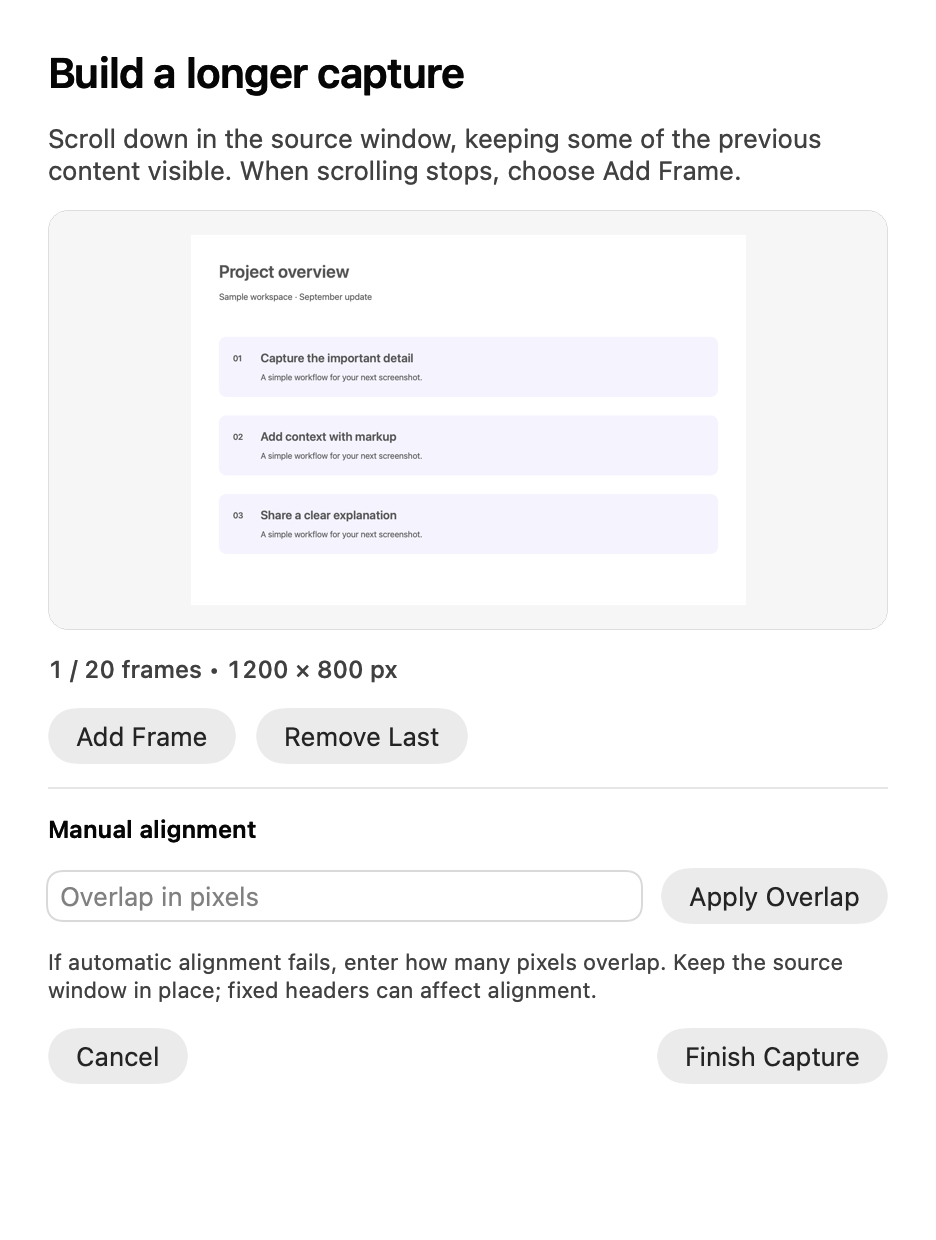
If frames do not line up
Scroll less and retry, or choose Remove Last. If a captured frame cannot be aligned automatically, enter the number of overlapping pixels under Manual alignment and choose Apply Overlap. This is the shared height between the previous and pending frames, not how far you scrolled.
Repeated patterns and sticky headers can confuse automatic alignment. A failed frame keeps the last good composite intact. Limits: 20 frames, 40 megapixels of frames/output, and 16,384 pixels per side.
Mark up an image
Choose Arrow, Rectangle, Ellipse, Pen, or Highlight and drag on the canvas. The inspector controls color and stroke width. Style presets… lets you reuse annotation styles.
Text that stays editable
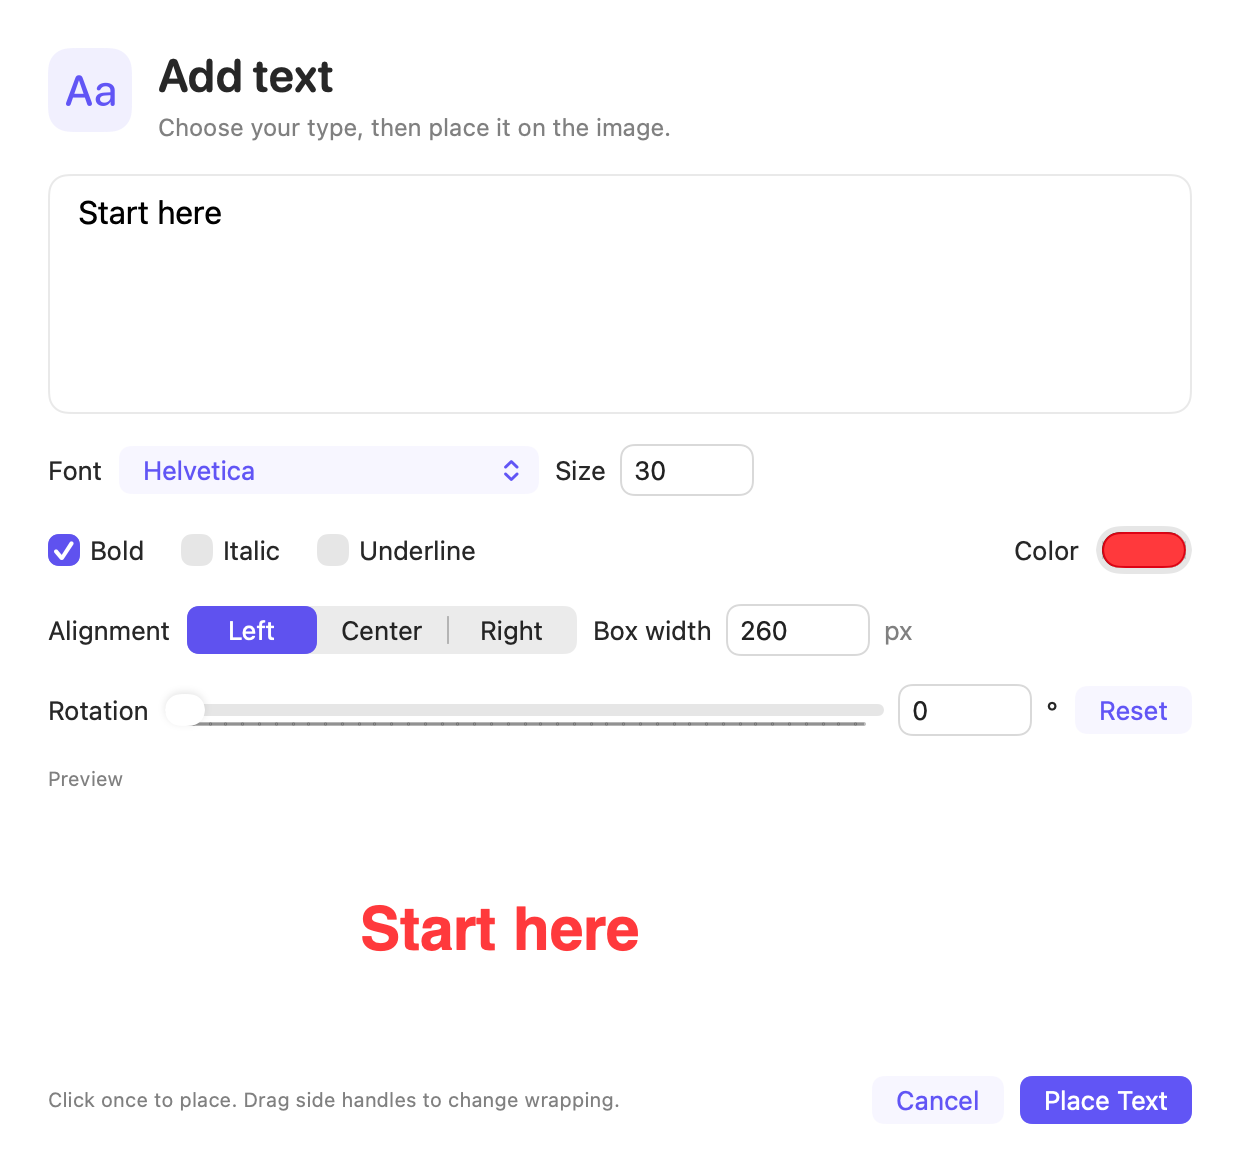
- Choose Text to open the formatting dialog. Set your text, font, size, bold/italic options, alignment, and box width.
- Choose Place Text, then click once on the image. The app returns to Select so later clicks do not stamp extra copies.
- With Select, drag the box to move it. Drag the side handles to change wrapping; its height follows the text.
- Drag the round handle above the box to rotate it through 360°, or enter an exact angle in the text dialog. Double-click text to edit it.
Numbered steps and object editing
Choose Step and click to add sequential callouts. Set the next number or restart at 1 in the inspector. Select an existing step to change its number and size.
Use Select to move or resize annotations. Duplicate or delete the selected object in the inspector. Arrow keys nudge it by one pixel; hold Shift for ten pixels. Undo and Redo cover editing, crop, resize, and redaction.
Canvas and image size
Use the lower-right zoom menu for Fit, Actual Pixels, or a zoom percentage. Hold Space and drag to pan. Crop keeps a dragged area; Resize image… in the inspector changes the image's pixel dimensions.
Projects, recovery & checkpoints
Save → Editable Project… creates a .trovucapture file containing the image and editable annotations. Use File → Open Project… or Projects in the top bar to reopen work.
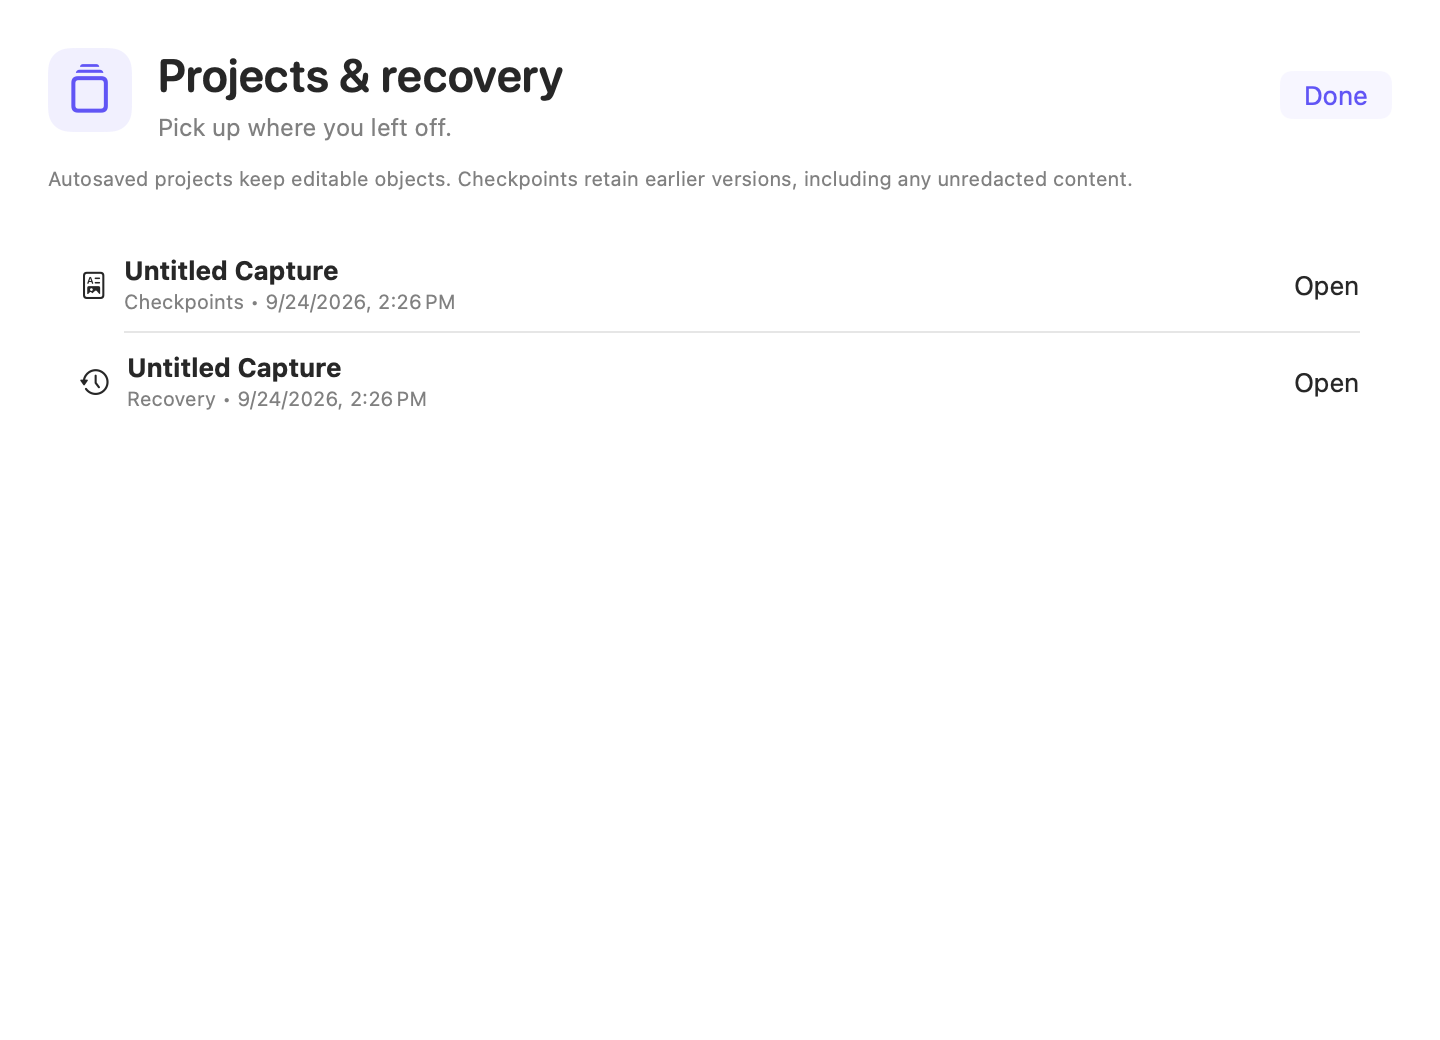
The app autosaves unfinished work. When available, Recover last session appears in an empty editor; recovery entries also appear in Projects.
Save → Save Checkpoint records a version you can return to through Projects. Checkpoints can contain earlier, unredacted content.
Discard screenshot… asks for confirmation, then clears the current editor and undo history. Original captures already saved in Library and explicitly saved projects are kept. Closing the editor window hides it; Show Editor in the menu-bar menu brings it back.
Find and organize captures
Library lists PNG captures in your selected capture folder. Search filenames, titles, tags, and indexed screenshot text. Filter by date, tag, or favorites.
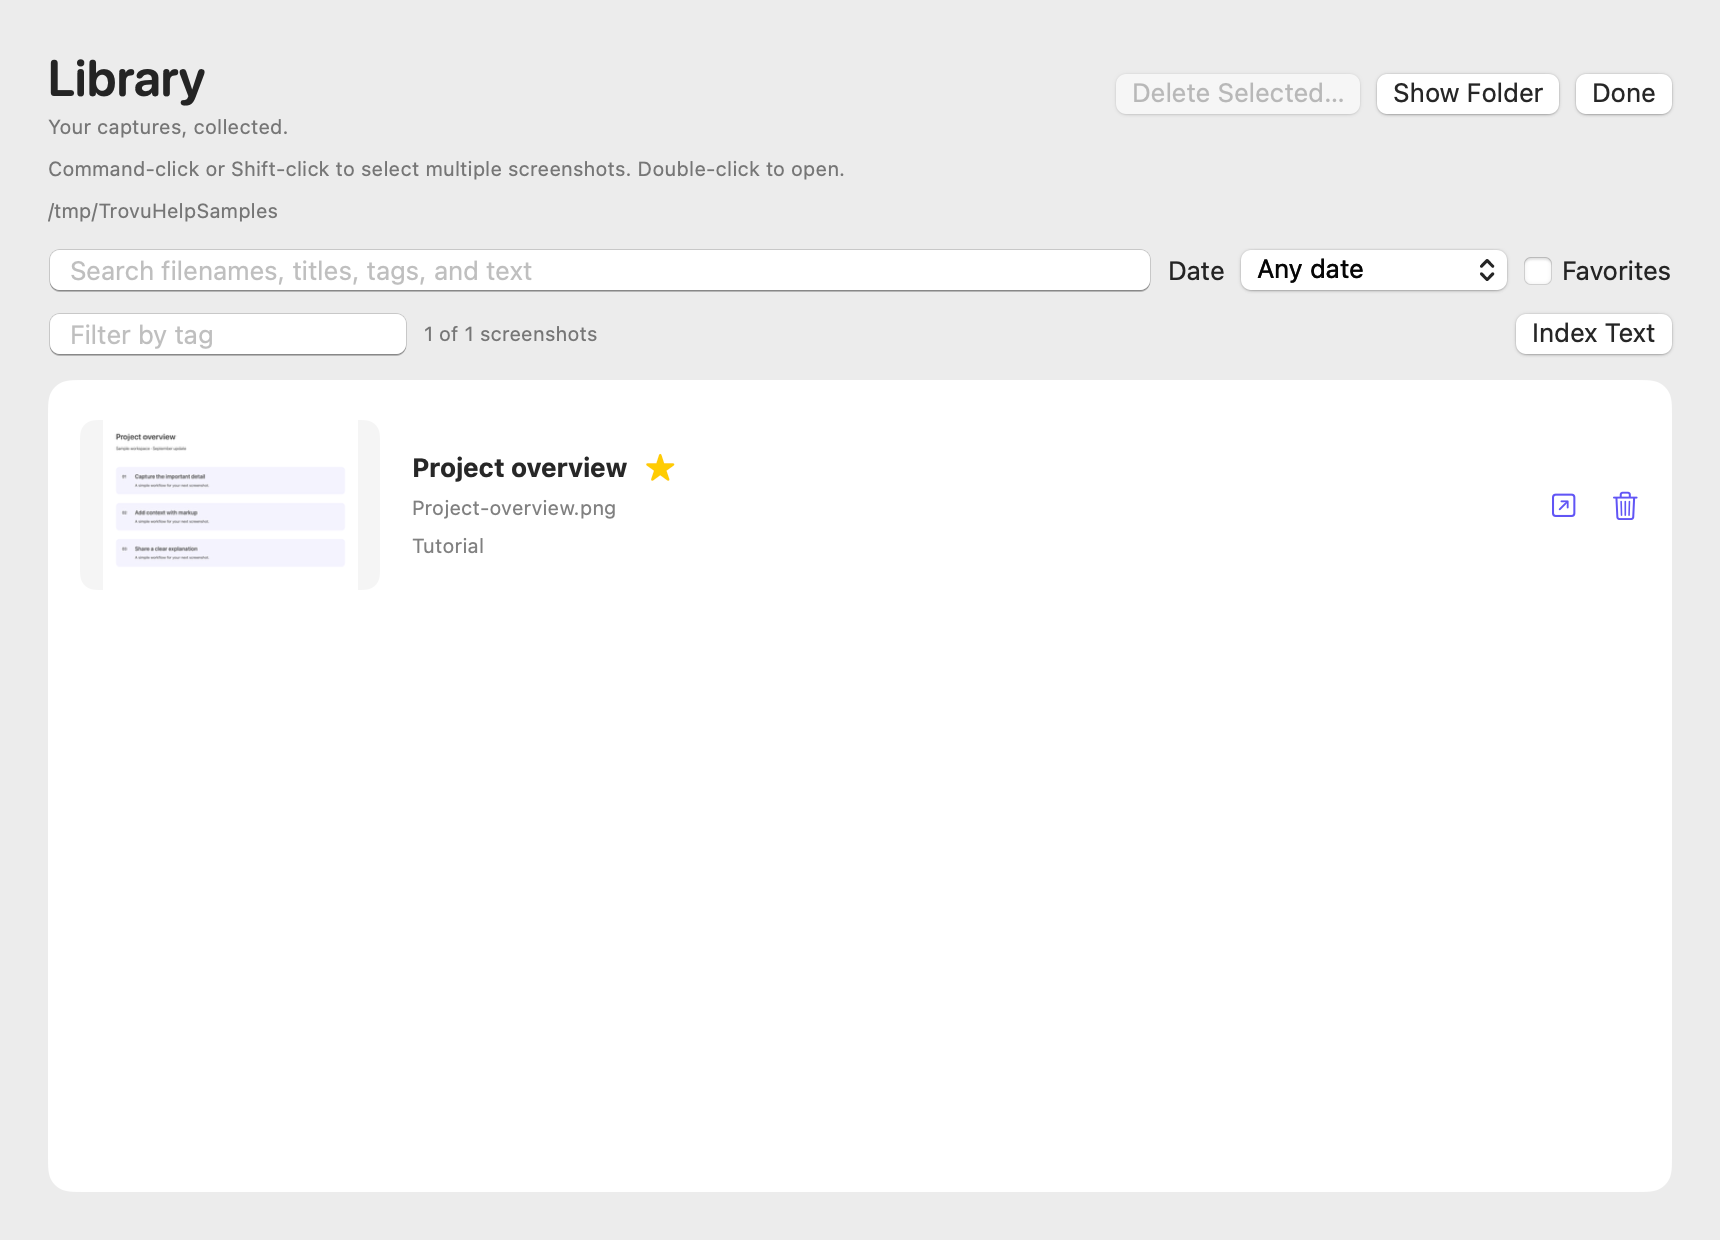
- Choose Index Text to recognize screenshot text locally. Progress and cancellation controls appear while indexing.
- Select one capture to edit its title and comma-separated tags, save details, or toggle its favorite star.
- Double-click a row or use its Open button to edit it. An associated editable project is opened when available.
Command-click or Shift-click to select multiple captures. Delete Selected… moves the selected image files to Trash after confirmation. Create Guide starts a guide from selected rendered images.
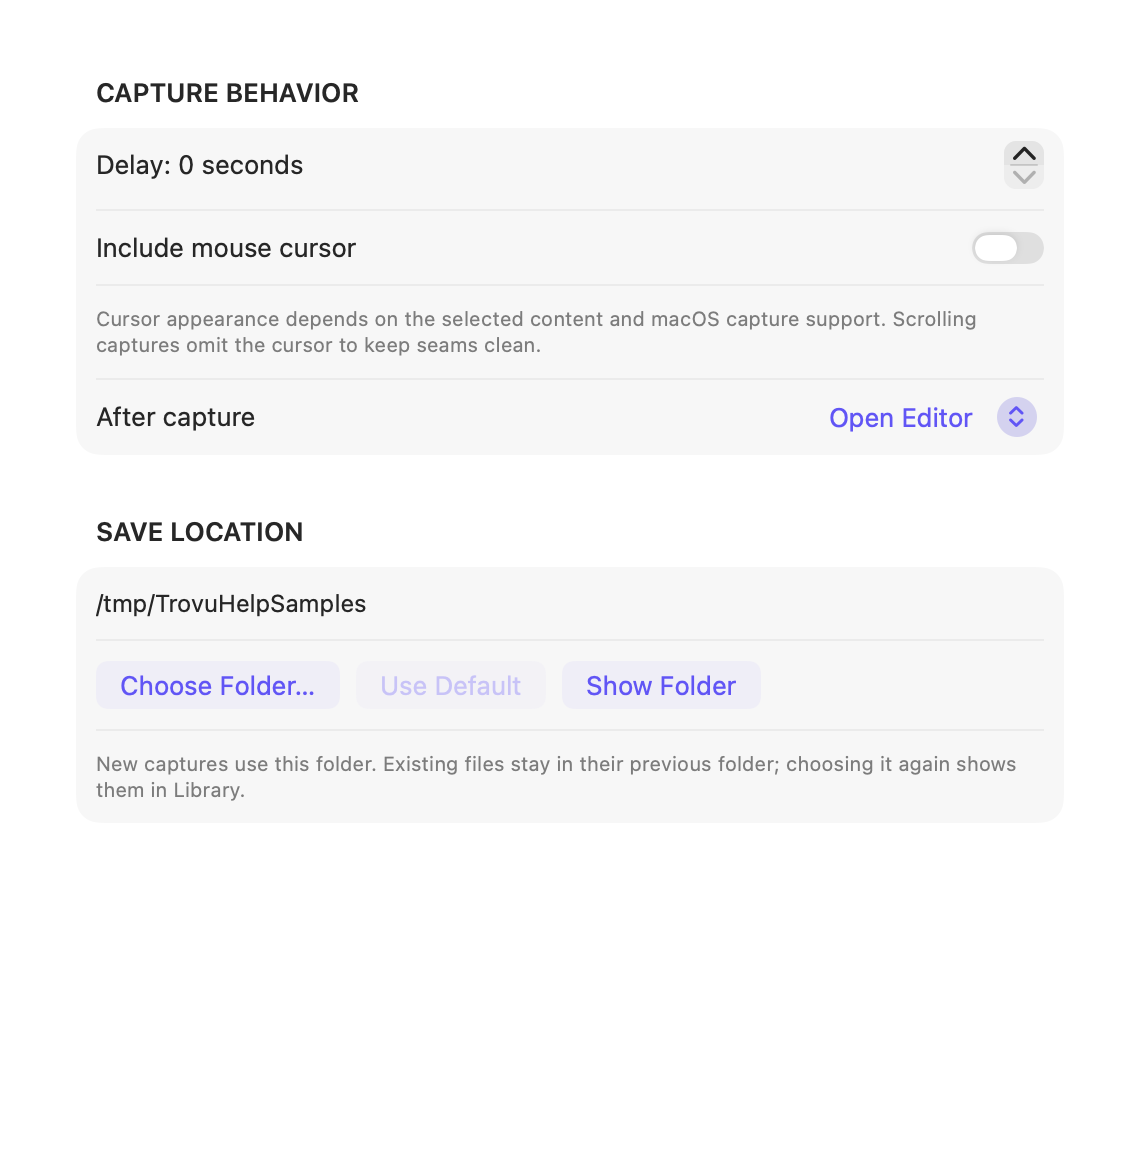
Choose a storage folder in Settings → Capture → Save Location. Existing captures stay in their old folder; select that folder again to view them. If a drive becomes unavailable, Trovu reports the error and keeps the image available for manual saving.
Redact → Pixelate… adds a mosaic effect with adjustable block size. Pixelated text can remain recognizable; use Solid cover for sensitive information.
Redact sensitive information
In the inspector, choose Redact → Select Area… and drag over the information to hide. Confirm to cover the pixels with opaque color.
Find Sensitive Text… uses local text recognition to suggest email addresses and phone numbers. Review and select suggestions before applying them. Detection can miss sensitive information.
Redaction flattens current annotations and covers the selected pixels in new rendered output. Older originals, projects, checkpoints, and undo history may retain the information. Share a new flattened export after redacting, not an older project or original capture.
Extract text from a screenshot
Read QR code → Select QR Area… decodes a selected region; Entire Image searches the full screenshot. Decoded content is copied automatically. Multiple results are separated by line breaks. Links are never opened automatically.
On macOS 15 or later, first choose Extract text → Entire Image or Select Area…, wait for recognition, then choose Translate… in that results dialog. Choose source and target languages, then Translate. Apple may request a language download. Translation runs on your Mac, leaves the screenshot unchanged, and can be copied or saved as text.
Choose Extract text → Entire Image, or Select Area… and drag a rectangle. Recognition uses Apple's local Vision framework.
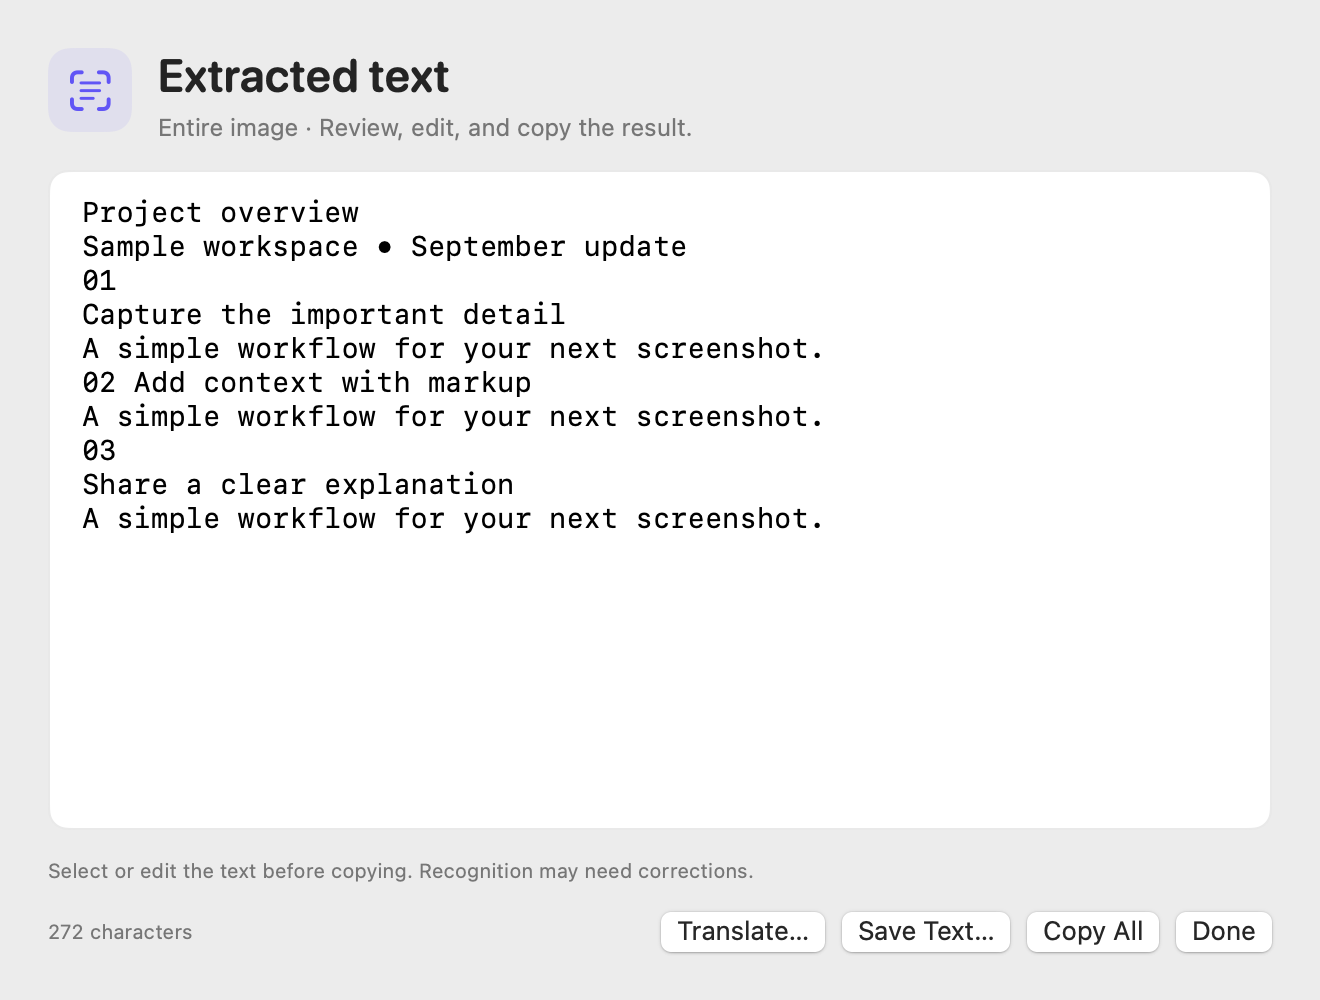
Review and correct the recognized text, then copy it to the clipboard or save a UTF-8 text file. Text extraction does not crop or change the image. Escape cancels area selection.
Turn screenshots into a guide
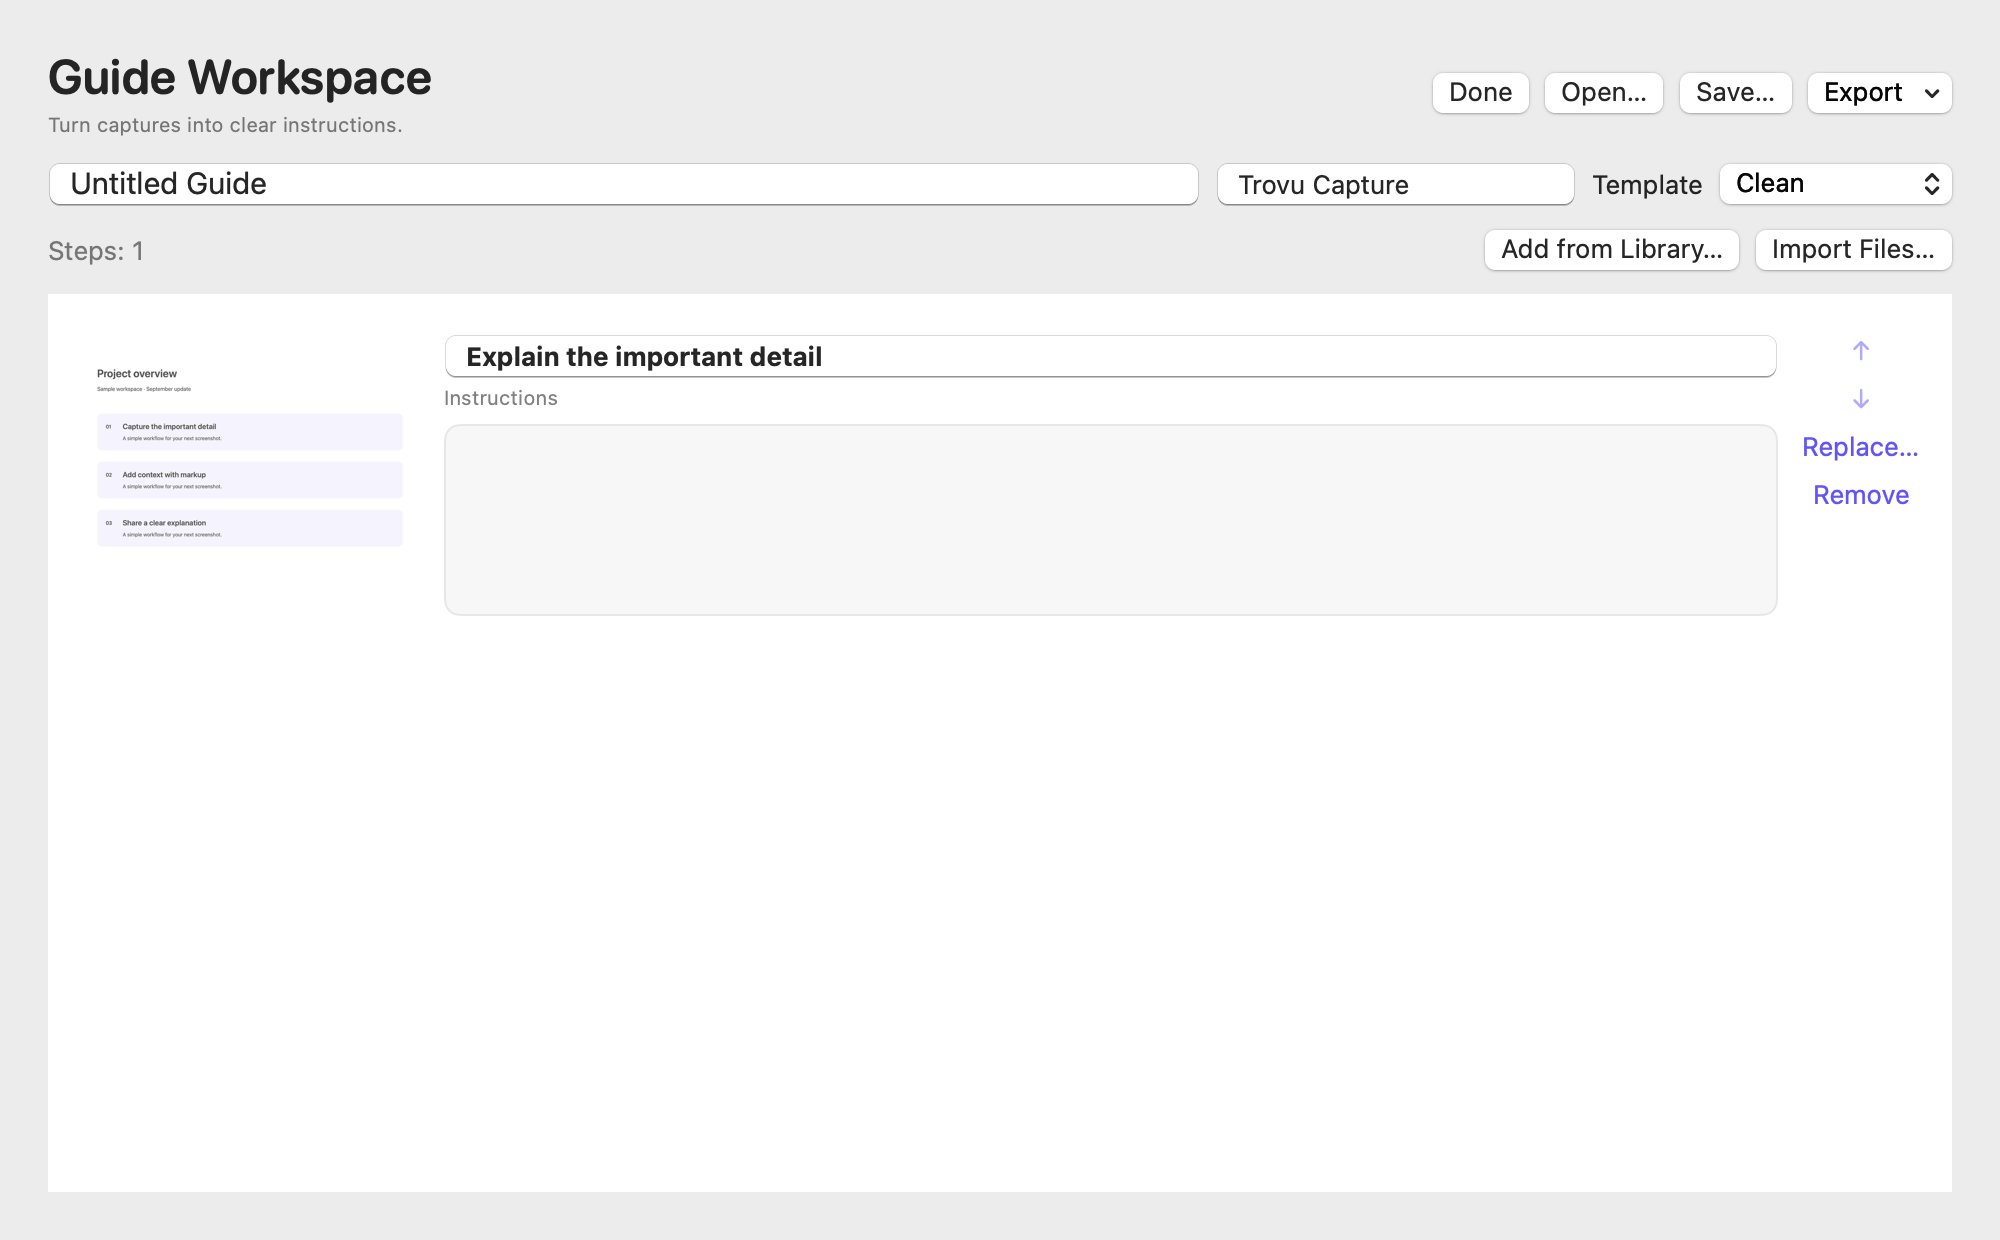
- Choose Guide for the current rendered image, or select Library captures and choose Create Guide.
- Set a title, brand, and template. Add a title and instructions for each step.
- Use the arrows to reorder steps. Add from Library… selects saved captures. Import Files… accepts external images and editable projects; Replace changes a step's screenshot.
- Save an editable
.trovuguidefile to continue later.
Export creates a multipage PDF, self-contained HTML, or a Markdown folder with image assets. Keep the Markdown file and its images folder together when sharing.
Export, present & share
New captures and imported images start without a decorative background. Existing editable projects restore their saved layout. Use Background… when you want to add a frame.
Remove Background… has two methods. White background removes near-white pixels connected to image edges, such as a white outer margin; enclosed white lettering is preserved. Increase White tolerance for light gray shades. Automatic (AI + edges) uses Apple’s class-agnostic subject model first, then rectangle detection when no subject is found. The fallback keeps the largest qualifying panel and makes its surroundings transparent regardless of color. Review the preview before applying; complex interfaces can contain multiple candidates.
Review the checkerboard transparency preview, then Apply. The result updates the editor and clipboard and saves a separate editable Library project; the original stays intact. Decorative fills, gradients, and shadows are cleared. Undo restores the prior image. Export PNG to keep transparency; JPEG does not support it. The checkerboard is editor chrome and is never exported.
Share… → iCloud Link… uploads a flattened copy to your own iCloud Drive. Choose Upload & Copy Link to generate a download link and copy it to the clipboard. Anyone with the link can download the snapshot until Apple's expiration date, shown in the dialog. Later edits do not change the shared snapshot. iCloud Drive, a network connection, and available storage are required. Show iCloud Copy reveals the uploaded file.
Save → Export Image… offers PNG, JPEG, TIFF, and PDF. Exports and clipboard copies flatten all visible annotations.
For PDF, choose Fit to Letter, Fit to A4, or Original image size. Fit modes preserve proportions and select portrait or landscape automatically.
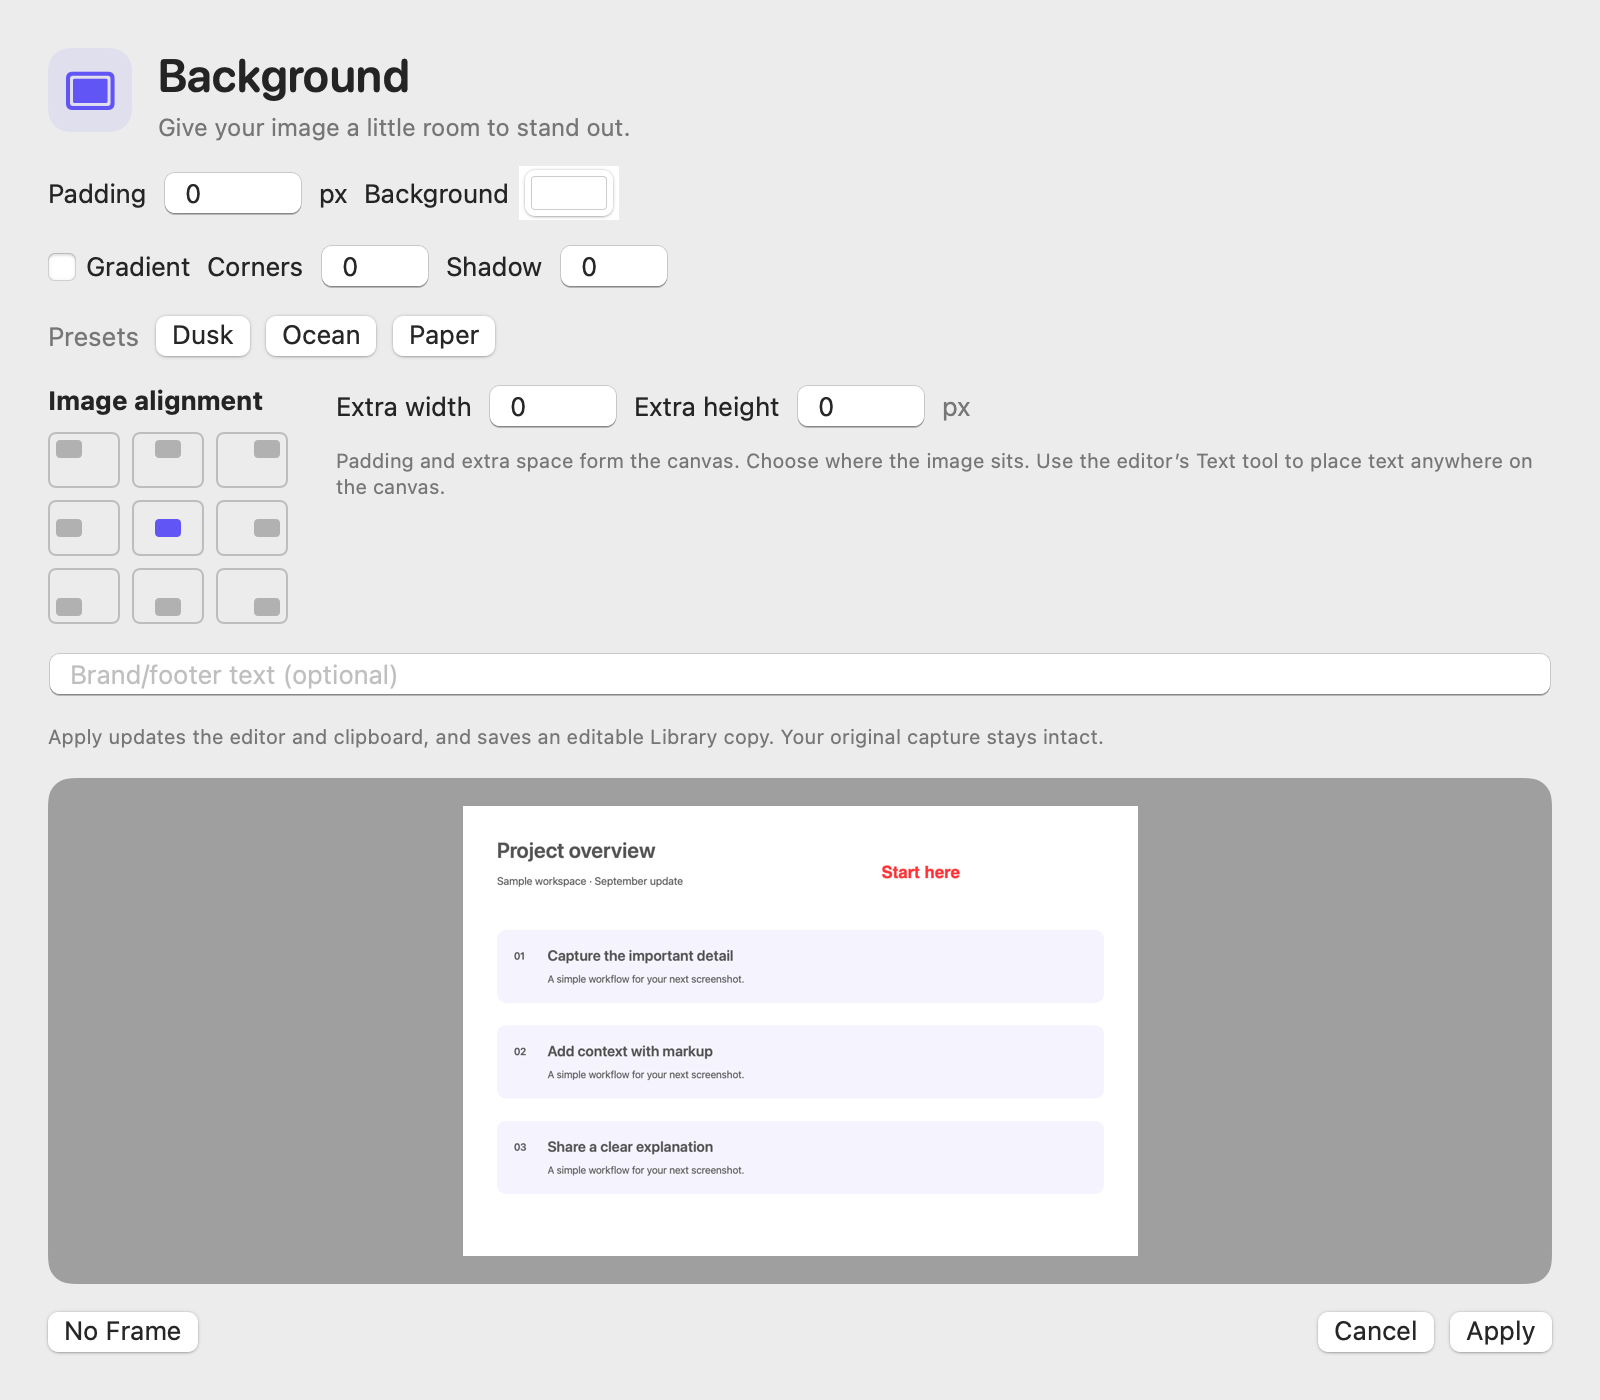
Background… in the inspector adds padding, solid or two-color gradient backgrounds, rounded corners, shadows, and optional brand text. Start with Dusk, Ocean, or Paper, then adjust the settings. Image position offers nine alignments across the padding and any extra width or height. Choose image alignment in the nine-position grid. Use the normal editor Text tool to place, move, resize, or rotate text anywhere on the expanded background. Apply shows the background in the editor, copies the finished image to the clipboard, and saves a separate editable .trovucapture project in Library. The original capture remains unchanged. Settings are preserved in editable projects; annotations remain editable.
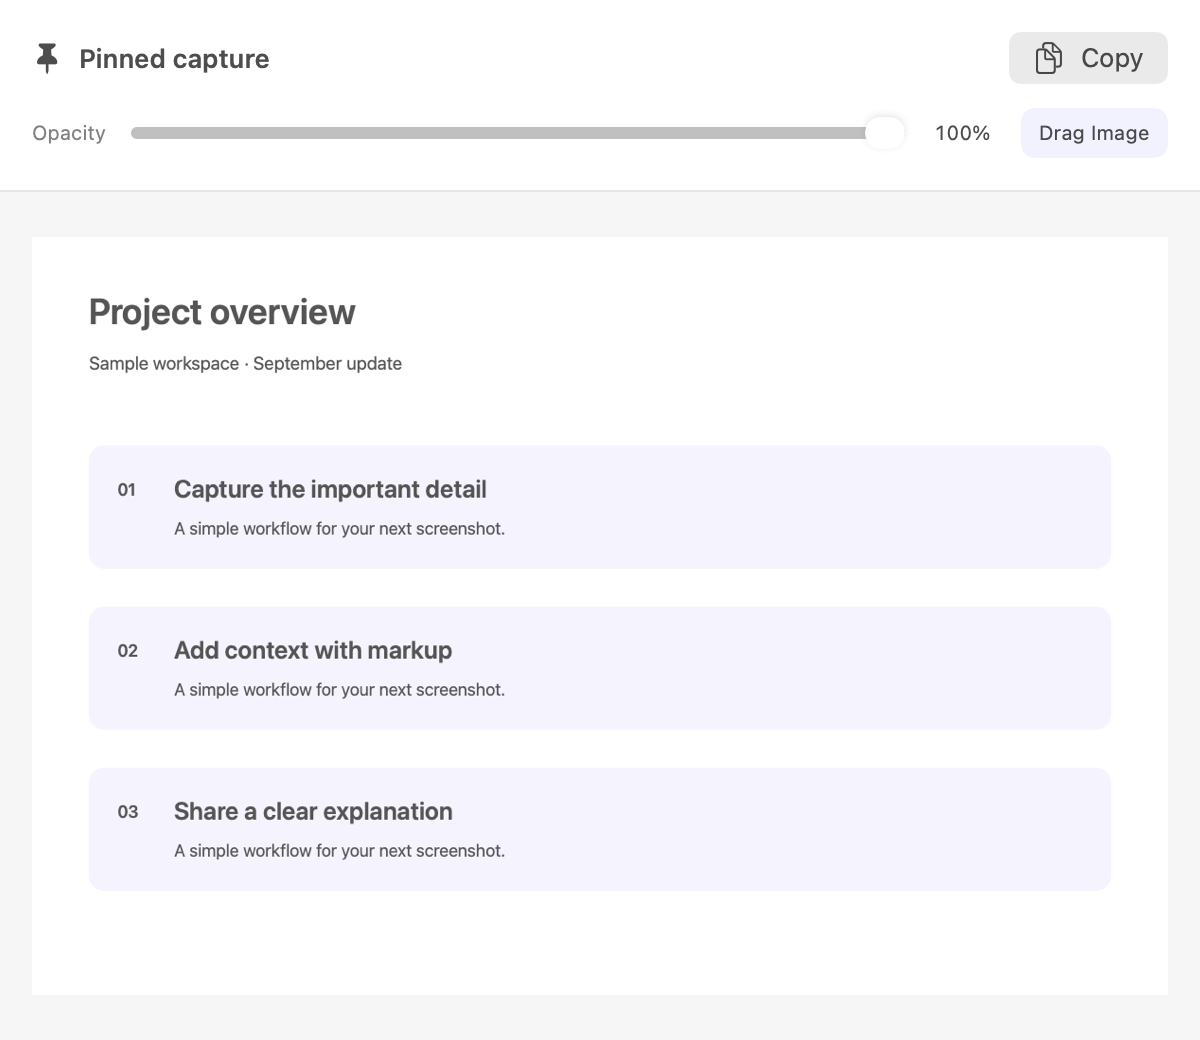
Share… uses macOS sharing. Click and hold the Drag Image handle at the bottom of the editor, drag into Finder or another app, then release. It transfers a rendered PNG; clicking alone does not export. Dragging the image canvas is for editing. Pin on screen opens a floating, movable and resizable image with an opacity control.
Trial and one-time unlock
The App Store download is free. Choose Start 14-day Trial — Free to try all features for 14 days, or choose Full Unlock for a one-time purchase. There is no subscription or automatic charge at trial end. The current localized price appears before purchase.
Open Trovu Capture → Trial & Purchase… to see your status or Restore Purchases using the Apple Account that acquired the trial or unlock. Reinstalling does not restart the trial. After it expires, new capture/editing requires Full Unlock; saved files remain on your Mac, Show Capture Folder remains available, and you can save work already open in the editor.
A development build marked “All features enabled” is for local testing and does not start a trial. Store builds use Apple's verified purchase transactions.
Make capture fit your workflow
Open Trovu Capture → Settings… with ⌘,.
- General: Open at Login starts Trovu after you sign in, including after a reboot. Start in the menu bar keeps the editor and Dock icon hidden at launch. macOS may require approval in Login Items.
- Capture: Set a 0–10 second delay, choose cursor inclusion, set the capture folder, and select what happens after capture.
- Shortcuts: Record a key combination for each capture mode. Include Control, Option, or Command. Conflicts are reported.
Crash reports
In Settings → General, Send crash reports controls optional Sentry crash/error diagnostics. Reports do not include screenshots, extracted text, or document contents.
After capture
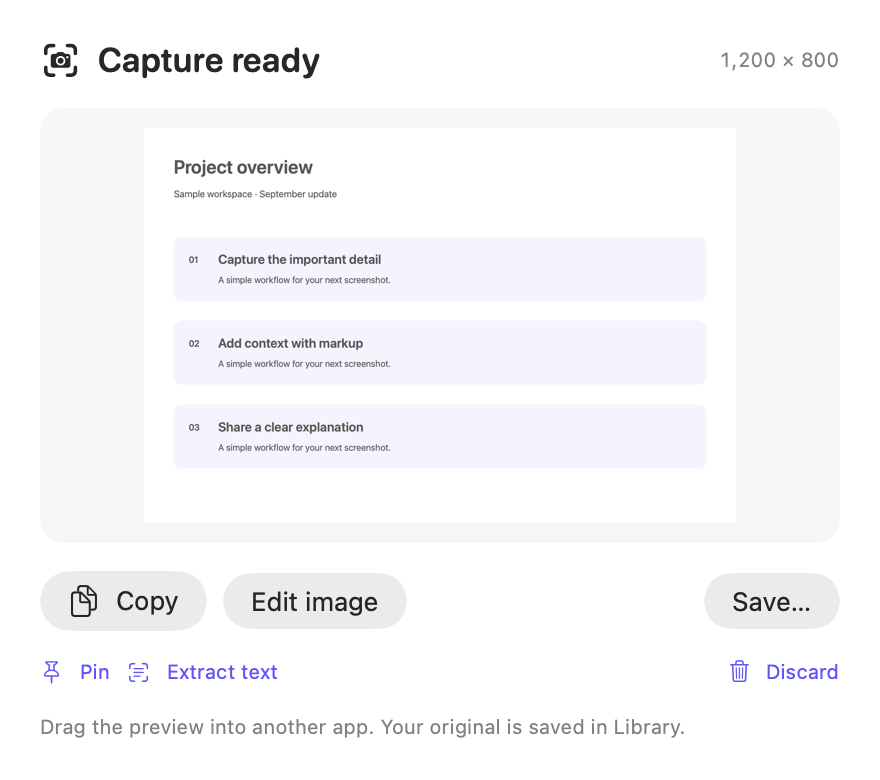
Choose Open Editor, Quick Preview, Copy to Clipboard, or Save to Library. Every option still copies the original capture immediately. Quick Preview provides Copy, Edit, Save, Pin, Text, and Discard. Closing that preview keeps the saved Library capture.
Cursor inclusion depends on macOS and the selected content. Scrolling captures omit it to keep seams clean.
Keyboard shortcuts
These are the capture defaults. Your assignments in Settings → Shortcuts take precedence; the capture menus show the current bindings.
| Action | Default |
|---|---|
| Selected region / Window / Full screen | Control–Shift–2 / 3 / 4 |
| All screens / Freeform | Control–Shift–5 / 6 |
| Repeat region / Scrolling | Unassigned; configure in Settings |
| Open image / Export image | ⌘O / ⌘S |
| Copy image / Duplicate annotation | ⇧⌘C / ⌘D |
| Undo / Redo | ⌘Z / ⇧⌘Z |
| Fit / Actual pixels | ⌘1 / ⌘0 |
| Pan / Nudge selection | Space-drag / Arrow keys (Shift for 10 px) |
| Settings / Help | ⌘, / ⇧⌘/ |
Troubleshooting
Screen capture permission
In macOS System Settings → Privacy & Security → Screen & System Audio Recording, enable Trovu Capture. Relaunch if macOS requests it. Use the installed copy in Applications consistently.
If a window capture fails, keep that window open and visible, select it again, or try Selected Region. Avoid repeatedly changing permission settings when another capture mode works.
Background removal says no subject
The image is loaded, but subject and rectangle detection could not isolate suitable content. Try a closer crop, or White background for an edge-connected white margin. This mode preserves enclosed white text; it is not a general-purpose eraser for arbitrary colors.
A capture is missing from Library
Check the selected Save Location in Settings. A disconnected drive or unwritable folder can prevent automatic saving. The image remains available in the editor for manual export.
Text wraps too early or an annotation cannot be edited
Select a text box and drag a side handle to change its wrapping width. For editable objects after reopening, open the .trovucapture project; PNG/JPEG/TIFF/PDF exports contain flattened pixels.
Scrolling alignment fails
Leave more overlap, wait for animation to stop, and exclude fixed headers. Use Remove Last to retry or Apply Overlap for the pending frame. See Scrolling capture.
Login startup or a shortcut does not work
Check Settings → General for login status and any macOS approval request. Shortcuts require Trovu to be running. Reassign conflicting combinations in Settings → Shortcuts.